Introduction
Windows 8 allows one application (or two in Split mode) to be active at a time and to have access to the central processing unit (CPU) resources. When launching a new app or switching to another running app, the current app enters into a suspended state. It is still in memory, but its processes are frozen and it has no access to resources. This greatly improves device speed and battery life.
Suspended apps can be made active (using left-edge swiping), and they are immediately resumed in memory. However, in loading a new app, memory resources may be needed and thus Windows 8 may terminate one or more suspended apps to reclaim the memory space. The goal in Windows Store app interface is to make all apps appear that they are constantly running. If the user was in the middle of an operation in an app when it was suspended to view another app, they will expect that their work in progress will still be available when returning to the app. But if the suspended app was terminated to clear memory space or the device crashed, the work in progress will be lost. In this lesson you will examine methods for managing an app's lifecycle so that when an app is being suspended, its data is saved and can be restored even if the app is terminated.
- Explain the Application Lifecycle process for a Windows Store app.
- Code the App.xaml.cs/vb file to save and restore session state information when an app has been terminated by the operating system.
- Modify a page's code-behind file to save and restore user data in progress when an app has been terminated by the operating system.
- Use the Debugger to simulate suspension, resumption, and termination.
- Overview of the Application Lifecycle
- Building the Demo App for Saving and Restoring the Session Status
- Simulating Suspension, Resuming, and Termination
- Coding to Save and Restore the Session Data
- Saving and Restoring User Data in Progress
- Save User Data Frequently
- Quiz 6
- Assignment 6A (Building Directory Revisited)
Instruction
(Note: Due to the formatting limitations of this document, some code snippets presented here may include statements split on more than one line when in the code editor they should not be. E.g. literal strings (red text enclosed in quotes) must occur on one line. Make the appropriate corrections in the Visual Studio text editor.)
In previous versions of Windows, the user assumed responsibility for the lifecycle of a program. Multiple programs could be opened, each of which consumed memory, CPU processing and other resources. Open, but minimized applications could be viewed and managed from the Status Bar. If memory got too low, the user could terminate applications that were no longer necessary to the tasks at hand. The Windows 8 ecosystem represents a significant change in how Store apps are managed.
To reduce the taxation on the CPU cycles and improve battery life, only one application is active and consuming CPU processes and other resources. Other running apps are placed in suspended mode and may be terminated if memory resources are needed. It is essential then that any in-process user data is saved and restored when the app is returned to active status. This process gives the appearance that it was always running in the background. This chapter examines methods for managing an app's lifecycle to ensure a seamless experience for the user when an app is suspended or terminated and then resumed.
Overview of the Application Lifecycle
Review the diagram of the application lifecycle of a Windows 8 Store App in Figure 1, which is explained below.
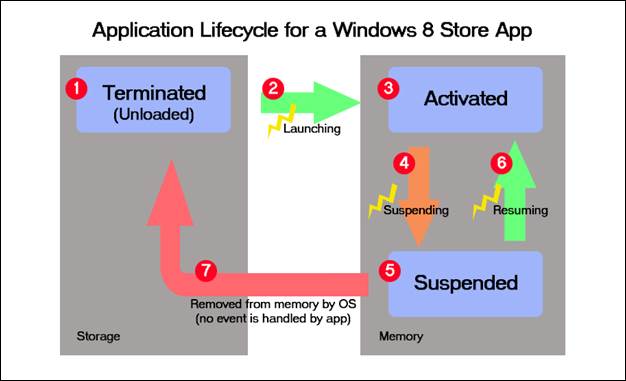
Figure 1 – The Application Lifecycle of a Windows 8 Store App
A terminated or unloaded app (1) is launched, copying the app's binary code into the device's memory (3) where it has access to the CPU and other resources such as drive storage, device camera, network, and so on, as permitted. A launching event (2) is triggered in this process with the app's code handled before making itself available to the user. For instance, the app might examine how it was launched or how it was last terminated. The various states could be handled with conditional structures in the appxaml.cs or app.xaml.vb code.
Activation types include the following:
- Launch: The user tapped or clicked the app's tile.
- File: The user opened a file whose file-type registration launched the app.
- Camera: The user wants to process a camera image with the app.
There are many other activation types. Review "Application lifecycle (Windows Store apps)" from the Windows Dev Center – Windows Store Apps website for more details.
The app is placed in a suspended state in memory (5) when the user launches another app or switches to another running app to make it the active app. A Suspending event (4) precedes the move to the suspended state and this event may be handled by the app and/or the current page. When an app is placed into a suspended state, it can be reactivated very quickly, returning to its former state with no loss of data. This might happen, for instance, if a user does a left swipe. A Resuming event (6) is sent and may be handled by the app or the most recent page. Life is good and the app is happy (along with the user).
The user, however, may have a number of apps running in their suspended states. If the memory is being taxed and the user wants to launch yet another app, Windows 8 will terminate one or more apps from the suspended state (7) and remove them from memory (1). No event is triggered, and potentially any data that the user had in progress is lost forever. The user has no control over which apps are terminated, nor do they have the option to save their data. Since no event is triggered, neither does the programmer. Accordingly, you might have an unhappy user whose in-progress data is now lost. The session state (for example, the active page) is also lost.
The critical part of Application Lifecycle Management (ALM) is to preserve data and the session state before an app is suspended. The app receives no CPU processing once it is suspended. You can save session state and any data in progress when the Suspending event is triggered. However, there is a limited timeframe to accomplish all the persistence tasks, which is 5 seconds. In addition to saving the data in progress in response to a Suspending event being triggered, it is wise to frequently save data along the way so as to ensure the ability to accomplish the final data-saving measures within the 5-second interval. For example, in an app with a database backend, save each record as it is modified or perform saves at specified intervals such as every 1 or 2 minutes.
Building the Demo App for Saving and Restoring the Session Status
You can build a simple app to save the application's session status and then restore it if the app is terminated. Begin with a Blank template. Add three Basic pages to the project and add navigation buttons between the pages. First, you will look at when an app fails to restore to its current state when terminated and re-launched. Then, you will add code to the app.xaml.cs or app.xaml.vb document. This allows you to save the current state upon suspending the app and to restore it upon launching if the app is terminated.
Step 1: Begin by creating a new app, using the Blank Template. Name it "ALM Demo 1". Then, add three new pages to the solution by choosing "Add New Item…" from the Project menu. You can use the default names of BasicPage1.xaml, BasicPage2.xaml, and BasicPage3.xaml.
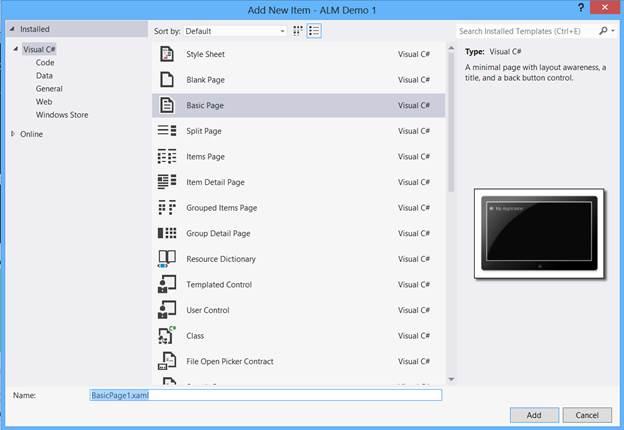
Figure 2 – Add three new Basic Page items to the project.
One of the great things about adding a Basic Page template is that this adds two helper classes to the Common folder of the project: SuspensionManager.cs and LayoutAwarePage.cs (or SuspensionManager.vb and LayoutAwarePage.vb). You will use methods from these two classes to save and restore the app's session state. These helper classes could also be added by copying and pasting them from an existing project in which they are used.
Rebuild the project (Build menu > Rebuild Solution) to incorporate the added classes.
Step 2: Open the BasicPage1.xaml in the Designer. Modify the xaml code by completing the following:
- Change the AppName in the Page.Resources section to "Page 1 (Red)". (Alternatively, you could hard code this in the pageTitle Textblock code, replacing Text="{StaticResource AppName}" with Text="Page 1 (Red)".
- Add a red rectangle to the second row of the grid.
Note the two highlighted lines in the following code snippet for BasicPage1.xaml, which are "Page 1 (Red)" and "<Rectangle Grid.Row="1" Fill="Red"/>".
<Page.Resources>
<!-- TODO: Delete this line if the key AppName is declared in App.xaml -->
<x:String x:Key="AppName">Page 1 (Red)</x:String>
</Page.Resources>
<!--
This grid acts as a root panel for the page that defines two rows:
* Row 0 contains the back button and page title
* Row 1 contains the rest of the page layout
-->
<Grid Style="{StaticResource LayoutRootStyle}">
<Grid.RowDefinitions>
<RowDefinition Height="140"/>
<RowDefinition Height="*" />
</Grid.RowDefinitions>
<!-- Back button and page title -->
<Grid>
<Grid.ColumnDefinitions>
<ColumnDefinition Width="Auto"/>
<ColumnDefinition Width="*"/>
</Grid.ColumnDefinitions>
<Button x:Name="backButton" Click="GoBack"
IsEnabled="{Binding Frame.CanGoBack, ElementName=pageRoot}"
Style="{StaticResource BackButtonStyle}"/>
<TextBlock x:Name="pageTitle" Grid.Column="1" Text="{StaticResource AppName}"
Style="{StaticResource PageHeaderTextStyle}"/>
</Grid>
<Rectangle Grid.Row="1" Fill="Red"/>
<VisualStateManager.VisualStateGroups
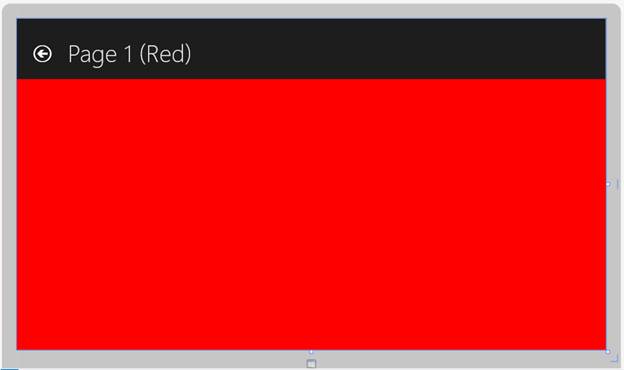
Figure 3 – The appearance of BasicPage1 after the above changes to its XAML code.
Step 3: Now make the same changes to BasicPage2.xam, but give it the name "Page 2 (Green)" and fill the rectangle with green instead of red.
Note the two highlighted lines in the following code snippet for BasicPage2.xaml, which are "Page 2 (Green)" and <Rectangle Grid.Row="1" Fill="Green"/>".
XAML Code for BasicPage2.xaml
<Page.Resources>
<!-- TODO: Delete this line if the key AppName is declared in App.xaml -->
<x:String x:Key="AppName">Page 2 (Green)</x:String>
</Page.Resources>
<!--
This grid acts as a root panel for the page that defines two rows:
* Row 0 contains the back button and page title
* Row 1 contains the rest of the page layout
-->
<Grid Style="{StaticResource LayoutRootStyle}">
<Grid.RowDefinitions>
<RowDefinition Height="140"/>
<RowDefinition Height="*"/>
</Grid.RowDefinitions>
<!-- Back button and page title -->
<Grid>
<Grid.ColumnDefinitions>
<ColumnDefinition Width="Auto"/>
<ColumnDefinition Width="*"/>
</Grid.ColumnDefinitions>
<Button x:Name="backButton" Click="GoBack"
IsEnabled="{Binding Frame.CanGoBack, ElementName=pageRoot}"
Style="{StaticResource BackButtonStyle}"/>
<TextBlock x:Name="pageTitle" Grid.Column="1" Text="{StaticResource AppName}"
Style="{StaticResource PageHeaderTextStyle}"/>
</Grid>
<Rectangle Grid.Row="1" Fill="Green"/>
<VisualStateManager.VisualStateGroups>
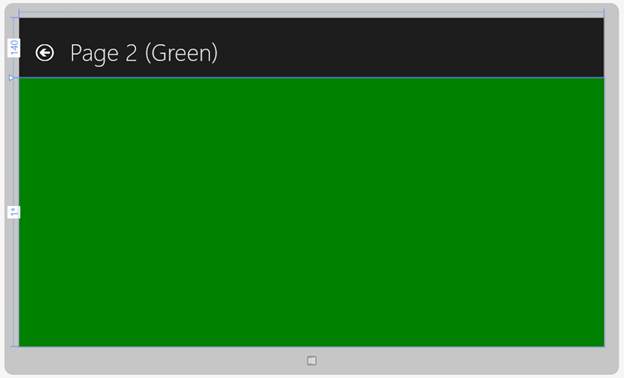
Figure 4 – The appearance of BasicPage2 after the above changes to its XAML code.
Step 4: Make the same changes to BasicPage3.xaml, but give it the name "Page 3 (Blue)" and fill the rectangle with blue.
Note the two highlighted lines in the following code snippet for BasicPage3.xaml, which are "Page 3 (Blue)" and "<Rectangle Grid.Row="1" Fill="Blue"/>".
XAML Code for BasicPage3.xaml
<Page.Resources>
<!-- TODO: Delete this line if the key AppName is declared in App.xaml -->
<x:String x:Key="AppName">Page 3 (Blue)</x:String>
</Page.Resources>
<!--
This grid acts as a root panel for the page that defines two rows:
* Row 0 contains the back button and page title
* Row 1 contains the rest of the page layout
-->
<Grid Style="{StaticResource LayoutRootStyle}">
<Grid.RowDefinitions>
<RowDefinition Height="140"/>
<RowDefinition Height="*"/>
</Grid.RowDefinitions>
<!-- Back button and page title -->
<Grid>
<Grid.ColumnDefinitions>
<ColumnDefinition Width="Auto"/>
<ColumnDefinition Width="*"/>
</Grid.ColumnDefinitions>
<Button x:Name="backButton" Click="GoBack"
IsEnabled="{Binding Frame.CanGoBack, ElementName=pageRoot}"
Style="{StaticResource BackButtonStyle}"/>
<TextBlock x:Name="pageTitle" Grid.Column="1" Text="{StaticResource AppName}"
Style="{StaticResource PageHeaderTextStyle}"/>
</Grid>
<Rectangle Grid.Row="1" Fill="Blue"/>
<VisualStateManager.VisualStateGroups>
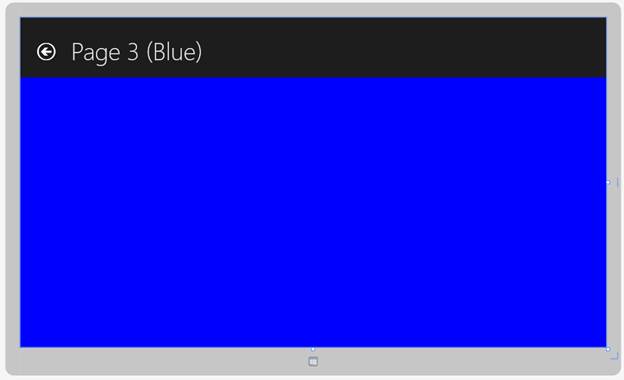
Figure 5 – The appearance of BasicPage3 after the above changes to its XAML code.
Step 5: Finally, you will modify the MainPage to include buttons that navigate to each of these three pages. Add a grid that displays a title for the app in the top row (similar to the Basic Page template) and places three buttons in the body of the second row. Add event handlers to these three buttons with method names of GoRed, GoGreen, and GoBlue, respectively.
XAML Code for MainPage.xaml
<Page
x:Class="ALM_Demo_1.MainPage"
xmlns="http://schemas.microsoft.com/winfx/2006/xaml/presentation"
xmlns:x="http://schemas.microsoft.com/winfx/2006/xaml"
xmlns:local="using:ALM_Demo_1"
xmlns:d="http://schemas.microsoft.com/expression/blend/2008"
xmlns:mc="http://schemas.openxmlformats.org/markup-compatibility/2006"
mc:Ignorable="d">
<Grid Background="{StaticResource ApplicationPageBackgroundThemeBrush}">
<Grid.RowDefinitions>
<RowDefinition Height="140"/>
<RowDefinition Height="*" />
</Grid.RowDefinitions>
<!-- Back button and page title -->
<Grid>
<Grid.ColumnDefinitions>
<ColumnDefinition Width="Auto"/>
<ColumnDefinition Width="*"/>
</Grid.ColumnDefinitions>
<TextBlock x:Name="pageTitle" Grid.Column="1"
Text="Application Lifecycle Demo (MainPage)" Style="{StaticResource
PageHeaderTextStyle}"/>
</Grid>
<Grid Style="{StaticResource LayoutRootStyle}" Grid.RowSpan="2">
<Grid.RowDefinitions>
<RowDefinition Height="140"/>
<RowDefinition Height="*" />
</Grid.RowDefinitions>
<!-- Back button and page title -->
<Grid>
<Grid.ColumnDefinitions>
<ColumnDefinition Width="30"/>
<ColumnDefinition Width="*"/>
</Grid.ColumnDefinitions>
<TextBlock x:Name="pageTitle1" Grid.Column="1"
Text="Application Lifecycle Demo (MainPage)"
Style="{StaticResource PageHeaderTextStyle}"/>
</Grid>
<Button Content="Go to Red Page" HorizontalAlignment="Left" Height="201"
Margin="148,148,0,0" Grid.Row="1" VerticalAlignment="Top" Width="202"
Background="Red" Click="GoRed"/>
<Button Content="Go to Green Page" HorizontalAlignment="Left" Height="201"
Margin="432,148,0,0" Grid.Row="1" VerticalAlignment="Top" Width="202"
Background="Green" Click="GoGreen"/>
<Button Content="Go to Blue Page" HorizontalAlignment="Left" Height="201"
Margin="741,148,0,0" Grid.Row="1" VerticalAlignment="Top" Width="202"
Background="Blue" Click="GoBlue"/>
</Grid>
</Grid>
</Page>
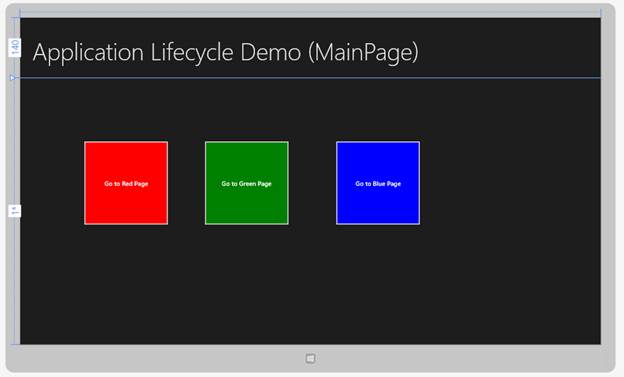
Figure 6 – The appearance of MainPage after changes to its XAML code.
Step 6: Code the three button handlers.
C# Code:
private void GoRed(object sender, RoutedEventArgs e)
{
this.Frame.Navigate(typeof(BasicPage1));
}
private void GoGreen(object sender, RoutedEventArgs e)
{
this.Frame.Navigate(typeof(BasicPage2));
}
private void GoBlue(object sender, RoutedEventArgs e)
{
this.Frame.Navigate(typeof(BasicPage3));
}
VB Code:
Private Sub GoRed(sender As Object, e As RoutedEventArgs)
Me.Frame.Navigate(GetType(BasicPage1))
End Sub
Private Sub GoGreen(sender As Object, e As RoutedEventArgs)
Me.Frame.Navigate(GetType(BasicPage2))
End Sub
Private Sub GoBlue(sender As Object, e As RoutedEventArgs)
Me.Frame.Navigate(GetType(BasicPage3))
End Sub
Simulating Suspension, Resuming, and Termination
Since Windows 8 only gives you 5 seconds between the active state and the suspended state, it would be very difficult to debug your app in the suspended state. Fortunately, the Debugger of Visual Studio 2012 allows you to simulate the Suspend, Restore, and the Suspend/Terminate processes.
When debugging, Visual Studio automatically displays the Debug and Debug Location toolbars; however, you also can display these toolbars using the View > Toolbars submenu. These toolbars are valid regardless of whether you are debugging the app in the Simulator, on the Local Machine, or on a remote device.
Step 7: Next, you can test your app in the simulator. In the simulator, navigate to the red page. Then in the Debug Location toolbar of Visual Studio, choose "Suspend".

Figure 7 – Suspending, Resuming, and Terminating events can be simulated in the Debugger.
Switch back to the simulator and the Start Screen (or the last app) will be showing. Your app is now in the Suspended mode.
Choose "Resume" from the status dropdown of the Debugger Location toolbar. Switch back to the simulator and your app has been restored to the current page. This is great!
What happens next if Windows needs to recoup some of the device's memory for another app and terminates your app in the process? To find an answer to this question, choose "Suspend and shutdown" to simulate the termination. Your app is no longer running in the simulator. Re-launch it in the simulator. Your app will open, but it will be back to displaying the MainPage rather than the red page where you last left off. Try this with the other pages, too. In the next section, you will learn how to fix the app to save and restore the current page if Windows terminates the app.
Coding to Save and Restore the Session Data
The App.xaml.cs and App.xaml.vb code-behind documents handle an OnLaunched method and an OnSuspending method that is prebuilt. You will use the OnSuspending method (which is triggered by the Suspending event) to save your session status. You will add code to the OnLaunched handler to restore the status if the app was terminated by the system, rather than by the user.
Step 8: Make the following modifications to the OnSuspending method of the App.xaml.cs or App.xaml.vb code:
C# – App.xaml.cs
private async void OnSuspending(object sender, SuspendingEventArgs e)
{
var deferral = e.SuspendingOperation.GetDeferral();
//TODO: Save application state and stop any background activity
await Common.SuspensionManager.SaveAsync();
deferral.Complete();
}
VB – App.xaml.vb
Private Async Sub OnSuspending(sender As Object, e As SuspendingEventArgs)
Handles Me.Suspending
Dim deferral As SuspendingDeferral = e.SuspendingOperation.GetDeferral()
Await Common.SuspensionManager.SaveAsync()
deferral.Complete()
End Sub
The SuspensionManager helper class contains a SaveAsync() method that handles saving the session status information for you. Since you are using the Await command to make it an asynchronous operation, you also need to add an Async modifier to the method declaration. Note that in both cases a deferral is created to ensure that the operation does not end prematurely. If the method does exceed the 5-second limit, however, the operation will automatically cease.
Step 9: Now, you need to code the restoration process if the app was terminated by the operating system.
C# code – App.xaml.cs
using Windows.UI.Popups;
. . . .
sealed partial class App : Application
{
/// <summary>
/// Initializes the singleton application object.
/// This is the first line of authored code
/// executed, and as such is the logical equivalent of main() or WinMain().
/// </summary>
public App()
{
this.InitializeComponent();
this.Suspending += OnSuspending;
}
/// <summary>
/// Invoked when the application is launched normally by the end user.
/// Other entry points
/// will be used when the application is launched to open a specific file, to
/// display search results, and so forth.
/// </summary>
/// <param name="args">Details about the launch request and process.</param>
protected async override void OnLaunched(LaunchActivatedEventArgs args)
{
Frame rootFrame = Window.Current.Content as Frame;
int xyz = 0;
// Do not repeat app initialization when the Window already has content,
// just ensure that the window is active
if (rootFrame == null)
{
// Create Frame to act as navigation context & navigate to the first page
rootFrame = new Frame();
Common.SuspensionManager.RegisterFrame(rootFrame, "appFrame");
if (args.PreviousExecutionState == ApplicationExecutionState.Terminated)
{
//TODO: Load state from previously suspended application
xyz = 1;
await Common.SuspensionManager.RestoreAsync();
}
// Place the frame in the current Window
Window.Current.Content = rootFrame;
}
if (rootFrame.Content == null)
{
// When the navigation stack isn't restored navigate to the first page,
// configuring the new page by passing required information as a
// navigation parameter
if (!rootFrame.Navigate(typeof(MainPage), args.Arguments))
{
throw new Exception("Failed to create initial page");
}
}
// Ensure the current window is active
Window.Current.Activate();
if (xyz == 1)
{
MessageDialog md = new MessageDialog("Returning from Terminated State",
"Previously Terminated");
await md.ShowAsync();
}
}
In the code pictured above, a variable of xyz was added. It serves as a flag for whether or not the app is terminated. If the app is terminated, the value of xyz is set to 1 and is later tested to show a MessageDialog if the value is 1. The RestoreAsync() method of the SuspensionManager is called to restore the data. The RegisterFrame() of the SuspensionManager registers the saved frame reference from a key pair stored in the saved information.
VB code – App.xaml.vb
Imports Windows.UI.Popups
NotInheritable Class App
Inherits Application
Protected Overrides Async Sub OnLaunched(args As _
Windows.ApplicationModel.Activation.LaunchActivatedEventArgs)
Dim rootFrame As Frame = Window.Current.Content
'Dim rootFrame As Frame = TryCast(Window.Current.Content, Frame)
Dim xyz As Integer = 0
' Do not repeat app initialization when the Window already has content,
' just ensure that the window is active
If rootFrame Is Nothing Then
' Create a Frame to act as navigation context and navigate to the first page
rootFrame = New Frame()
Common.SuspensionManager.RegisterFrame(rootFrame, "appFrame")
If args.PreviousExecutionState = ApplicationExecutionState.Terminated Then
' TODO: Load state from previously suspended application
xyz = 1 'Use as flag for showing MessageDialog after page is loaded
Await Common.SuspensionManager.RestoreAsync()
End If
' Place the frame in the current Window
Window.Current.Content = rootFrame
End If
If rootFrame.Content Is Nothing Then
' When the navigation stack isn't restored navigate to the first page,
' configuring the new page by passing required information as a navigation
' parameter
If Not rootFrame.Navigate(GetType(MainPage), args.Arguments) Then
Throw New Exception("Failed to create initial page")
End If
End If
' Ensure the current window is active
Window.Current.Activate()
If xyz = 1 Then
Dim md As MessageDialog = New MessageDialog("Return from Terminated State", _
"Previously Terminated")
Await md.ShowAsync()
End If
End Sub
''' <summary>
''' Invoked when application execution is being suspended. App state is saved
''' without knowing whether app will be terminated or resumed with the contents
''' of memory still intact.
''' </summary>
''' <param name="sender">The source of the suspend request.</param>
''' <param name="e">Details about the suspend request.</param>
Private Async Sub OnSuspending(sender As Object, e As SuspendingEventArgs) _
Handles Me.Suspending
Dim deferral As SuspendingDeferral = e.SuspendingOperation.GetDeferral()
Await Common.SuspensionManager.SaveAsync()
deferral.Complete()
End Sub
End Class
Step 10: After navigating to one of the three Basic Pages (red, green, or blue), test the application and simulate the suspend and termination processes. Upon re-launching, the app should return to the last page viewed and display a MessageDialog that it was terminated.
Note that the MessageDialog is included in this project for demonstration purposes only. In a real project, you want a seamless user experience. Accordingly, informing a user that he or she returned to a previous state is not a best practice!
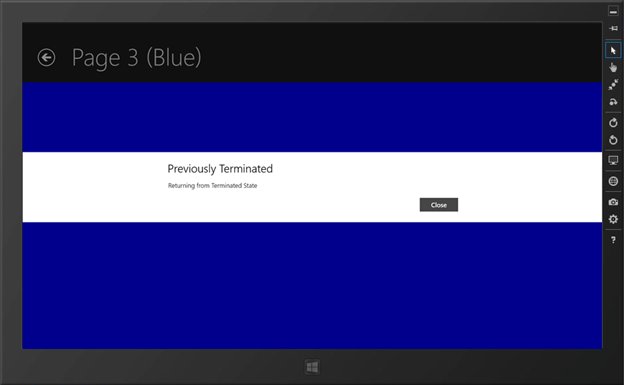
Figure 8 – The terminated project now returns to the last page. A MessageDialog is included in the demo to further emphasize the restoration.
Saving and Restoring User Data in Progress
Step 11: Now, you will add a TextBox control to the BasicPage1.xaml page. Give the textbox a name of txtName. You also can add a static TextBlock as a label if you like.
<Rectangle Grid.Row="1" Fill="Red"/>
<TextBlock HorizontalAlignment="Left" Height="20" Margin="80,73,0,0" Grid.Row="1"
TextWrapping="Wrap" Text="Enter your first and last name:"
VerticalAlignment="Top" Width="295" FontSize="16"/>
<TextBox x:Name="txtName" HorizontalAlignment="Left" Height="40"
Margin="79,95,0,0" Grid.Row="1" TextWrapping="Wrap" VerticalAlignment="Top"
Width="296" Tag="" ToolTipService.ToolTip="Enter your first and last name"/>
<VisualStateManager.VisualStateGroups>
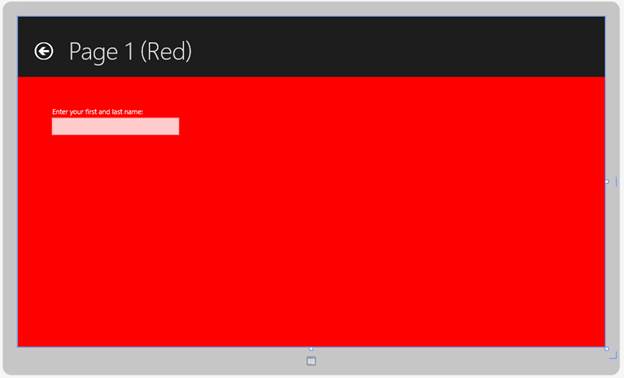
Figure 9 – A TextBlock and TextBox control is added to the BasicPage.xaml document.
Step 12: Debug the app in the simulator, navigate to the Red page (BasicPage1), and add your name. Then choose to "Suspend and shutdown" from the Debug Location toolbar. Re-launch the app. The restoration process restores the session state to the last page viewed, but the entered data is lost. The next step is to save and restore the session data.

Figure 10 – The value in the TextBox is lost when the app is terminated and re-launched.
The SuspensionManager.cs/vb class saves data as Dictionary key pairs. You can save session data as a key pair value and then restore data from the dictionary. The data is saved in an app data file in the user's Local directory. Thus, if you were saving data to be synchronized between devices, you would need to write a routine to save it to a server or to the cloud. You might try searching the Internet for information on "Windows 8 roaming app data". Review the following resources for more information on roaming app data:
- "Guidelines for roaming application data" from the Windows Dev Center – Windows Store Apps website
- "Roaming your app data" from the Windows 8 app developer blog
Step 13: The Basic Page templates include overriding methods for LoadState and SaveState. You simply need to add code to store your unsaved data in the dictionary within the SaveState method and load the data back into the controls in the LoadState method. The reference to pageState is a variable name that the Dictionary is copied to. You could change this name if you like, as long as you do so for all references to it within the method.
C# Code – BasicPage1.xaml.cs
protected override void LoadState(Object navigationParameter,
Dictionary<String, Object> pageState)
{
if (pageState != null)
{
txtName.Text = pageState["enteredName"] as string;
}
}
protected override void SaveState(Dictionary<String, Object> pageState)
{
pageState["enteredName"] = txtName.Text;
}
VB – BasicPage1.xaml.vb
Protected Overrides Sub LoadState(navigationParameter As Object,
pageState As Dictionary(Of String, Object))
If pageState IsNot Nothing AndAlso pageState.ContainsKey("enteredName") Then
txtName.Text = pageState.Item("enteredName")
End If
End Sub
Protected Overrides Sub SaveState(pageState As Dictionary(Of String, Object))
pageState("enteredName") = txtName.Text
End Sub
Step 14: Test the app again. Go to the Red page and enter your name in the Textbox. Then choose "Suspend and shutdown" in the Debugger. Launch the app again. The view should return to the Red page, and your name should be restored as the Text of the textbox.

Figure 11 – The value in the TextBox is now restored when the app is terminated and re-launched.
Step 15: To make the user's experience as seamless as possible, consider saving and restoring such things as the scroll positions of controls. On the BasicPage2.xaml, add a ScrollViewer with a TextBlock control inside it.
VB – BasicPage1.xaml.vb
<ScrollViewer x:Name="svProduce" HorizontalAlignment="Left" Height="400"
Margin="50,87,0,0" Grid.Row="1" VerticalAlignment="Top" Width="500"
VerticalScrollBarVisibility="Visible">
<TextBlock Margin="0,0,0,0" Foreground="Yellow"
FontFamily="Segoe UI" FontSize="36"
TextWrapping="Wrap" Width="430" >
ACME Produce offers . . .
<LineBreak/>Apples
<LineBreak/>Bananas
<LineBreak/>Cherries
<LineBreak/>Dates
<LineBreak/>Eggplant
<LineBreak/>Figs
<LineBreak/>Grapes
<LineBreak/>Honeydew
<LineBreak/>Iceberg Lettuce
<LineBreak/>Jalapenos
<LineBreak/>Kiwi
<LineBreak/>Lemons
<LineBreak/>Mushrooms
<LineBreak/>Nectarines
<LineBreak/>Oranges
<LineBreak/>Plums
</TextBlock>
</ScrollViewer>
In the code behind, add statements to save and load the data. A PageLoaded method was created to handle the page's Loaded event, providing enough refresh time to execute ScrollToVerticalOffset method.
C# – BasicPage2.xaml.cs
protected override void LoadState(Object navigationParameter,
Dictionary<String, Object> pageState)
{
if (pageState != null)
{
string svo = pageState["produceScroll"] as string;
Double.TryParse(svo, out vo); // vo is a class-level double variable
}
}
private void PageLoaded(object sender, RoutedEventArgs e)
{
svProduce.ScrollToVerticalOffset(vo);
svProduce.UpdateLayout();
}
protected override void SaveState(Dictionary<String, Object> pageState)
{
pageState["produceScroll"] = svProduce.VerticalOffset.ToString();
}
VB – BasicPage2.xaml.vb
Dim vo As Double
Protected Overrides Sub LoadState(navigationParameter As Object, pageState As
Dictionary(Of String, Object))
If pageState IsNot Nothing AndAlso pageState.ContainsKey("produceScroll") Then
Dim svo As String = pageState.Item("produceScroll")
vo = CDbl(svo) ' vo is a class-level variable
End If
End Sub
Private Sub PageLoaded(sender As Object, e As RoutedEventArgs)
Handles pageRoot.Loaded
svProduce.ScrollToVerticalOffset(vo)
svProduce.UpdateLayout()
End Sub
Protected Overrides Sub SaveState(pageState As Dictionary(Of String, Object))
pageState("produceScroll") = svProduce.VerticalOffset.ToString()
End Sub
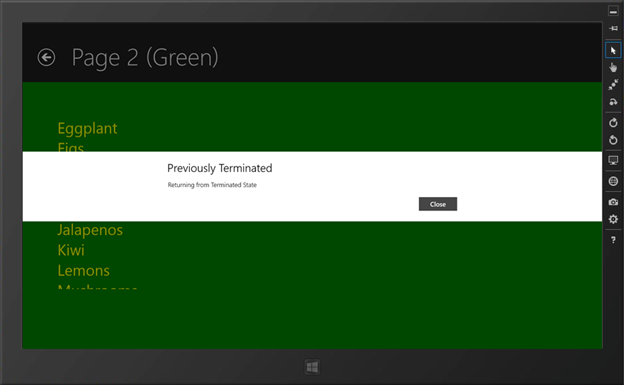
Figure 12 – The verticalOffset property of the scrollViewer (its scroll position) is saved via the SaveState methods and restored via the LoadState method in the BasicPage2.xaml.cs/vb code.
Save User Data Frequently
Form the most part, the days of a user explicitly saving their data or document might have passed. Now, it is more common for apps to automatically save data on a frequent basis. Given that you only have 5 seconds to save data in response to a suspending event, it would be foolish to try to save too much information. It is best practice to save session state information and the most recently unsaved data at that point. The rule of thumb is to save frequently. In the next unit, you will look at using JSON (JavaScript Object Notation) to save data in an XML format as you progress through an app.
Practice
- Visually explain the Application Lifecycle for a Windows 8 Store app to a classmate. Discuss where code is written to save and restore session state information. Discuss where code is written to save and restore the user data that was in progress when the app was suspended.
- Return to the Triangle Calculator that you created in Assignment 3A in Lesson 3. Add code to save any data in progress and restore it if the app is suspended and terminated.
Assignments
Complete the following:
- Quiz 6
- Assignment 6A (Building Directory Revisited)
Summary
Windows Store apps are placed in a suspended mode when another app is made active. Suspended apps that a user makes active, such as by left-side swiping, are restored from memory and appear to have been running the entire time. A problem arises when an app is launched and the device's memory is already consumed with suspended apps. In this scenario, Windows 8 will terminate one or more suspended apps to utilize those resources.
When the user then re-launches the app, it fails to go back to its previous state and any data that the user was working on is gone. The developer, however, can avoid this problem. The developer can manage the application's lifecycle to save and restore the session state information, such as the page the user was viewing, and the user data for the current page. Microsoft has included a SuspensionManager helper class that makes the process relatively painless. The session stat information can be saved and restored with the OnSuspending and OnLaunching methods of the App.xaml.cs/vb file. User data is saved and restored within the SaveState and LoadState handlers of a Page's code-behind file.

This work is created by the National Information Security and Geospatial Technologies Consortium (NISGTC), and except where otherwise noted, is licensed under the Creative Commons Attribution 3.0 Unported License